1.快速开始
https://haas.iot.aliyun.com/haasapi/index.html?#/Python/docs/zh-CN/startup/startup
2.串口驱动
https://haas.iot.aliyun.com/haasapi/index.html?spm=a2cpu.b92276856.0.0.1c2060b1hC8Xjt#/Python/docs/zh-CN/startup/HaaS_EDU_K1_startup?id=_31-%e4%b8%b2%e5%8f%a3%e5%90%8d%e7%a7%b0%e7%a1%ae%e8%ae%a4
3.board.json详解
https://g.alicdn.com/HaaSAI/PythonDoc/library/Driver.BoardConfig.html
4.代码
传感器:
https://gitee.com/haasedu/haasedu/blob/release_2.0/1-%E5%BF%AB%E9%80%9F%E5%BC%80%E5%A7%8B/2-%E4%BC%A0%E6%84%9F%E5%99%A8/%E4%BB%A3%E7%A0%81/HaaS_EDU_K1/Python/haaseduk1.py
数字量角器:
https://gitee.com/simonliu009/haas_eduk1_digital_protractor/blob/main/main.py
5.系统默认案例
https://help.aliyun.com/zh/alios-things/use-cases/haas-edu-use-cases?spm=a2c4g.11186623.0.0.57177668NDcM3p
6.组件介绍
https://help.aliyun.com/zh/alios-things/developer-reference/widgets/
7.编程接口能力
https://g.alicdn.com/HaaSAI/PythonDoc/quickstart/quickstart_haaseduk1.html#id7
8.micropython
zhuanlan.zhihu.com/p/641876391
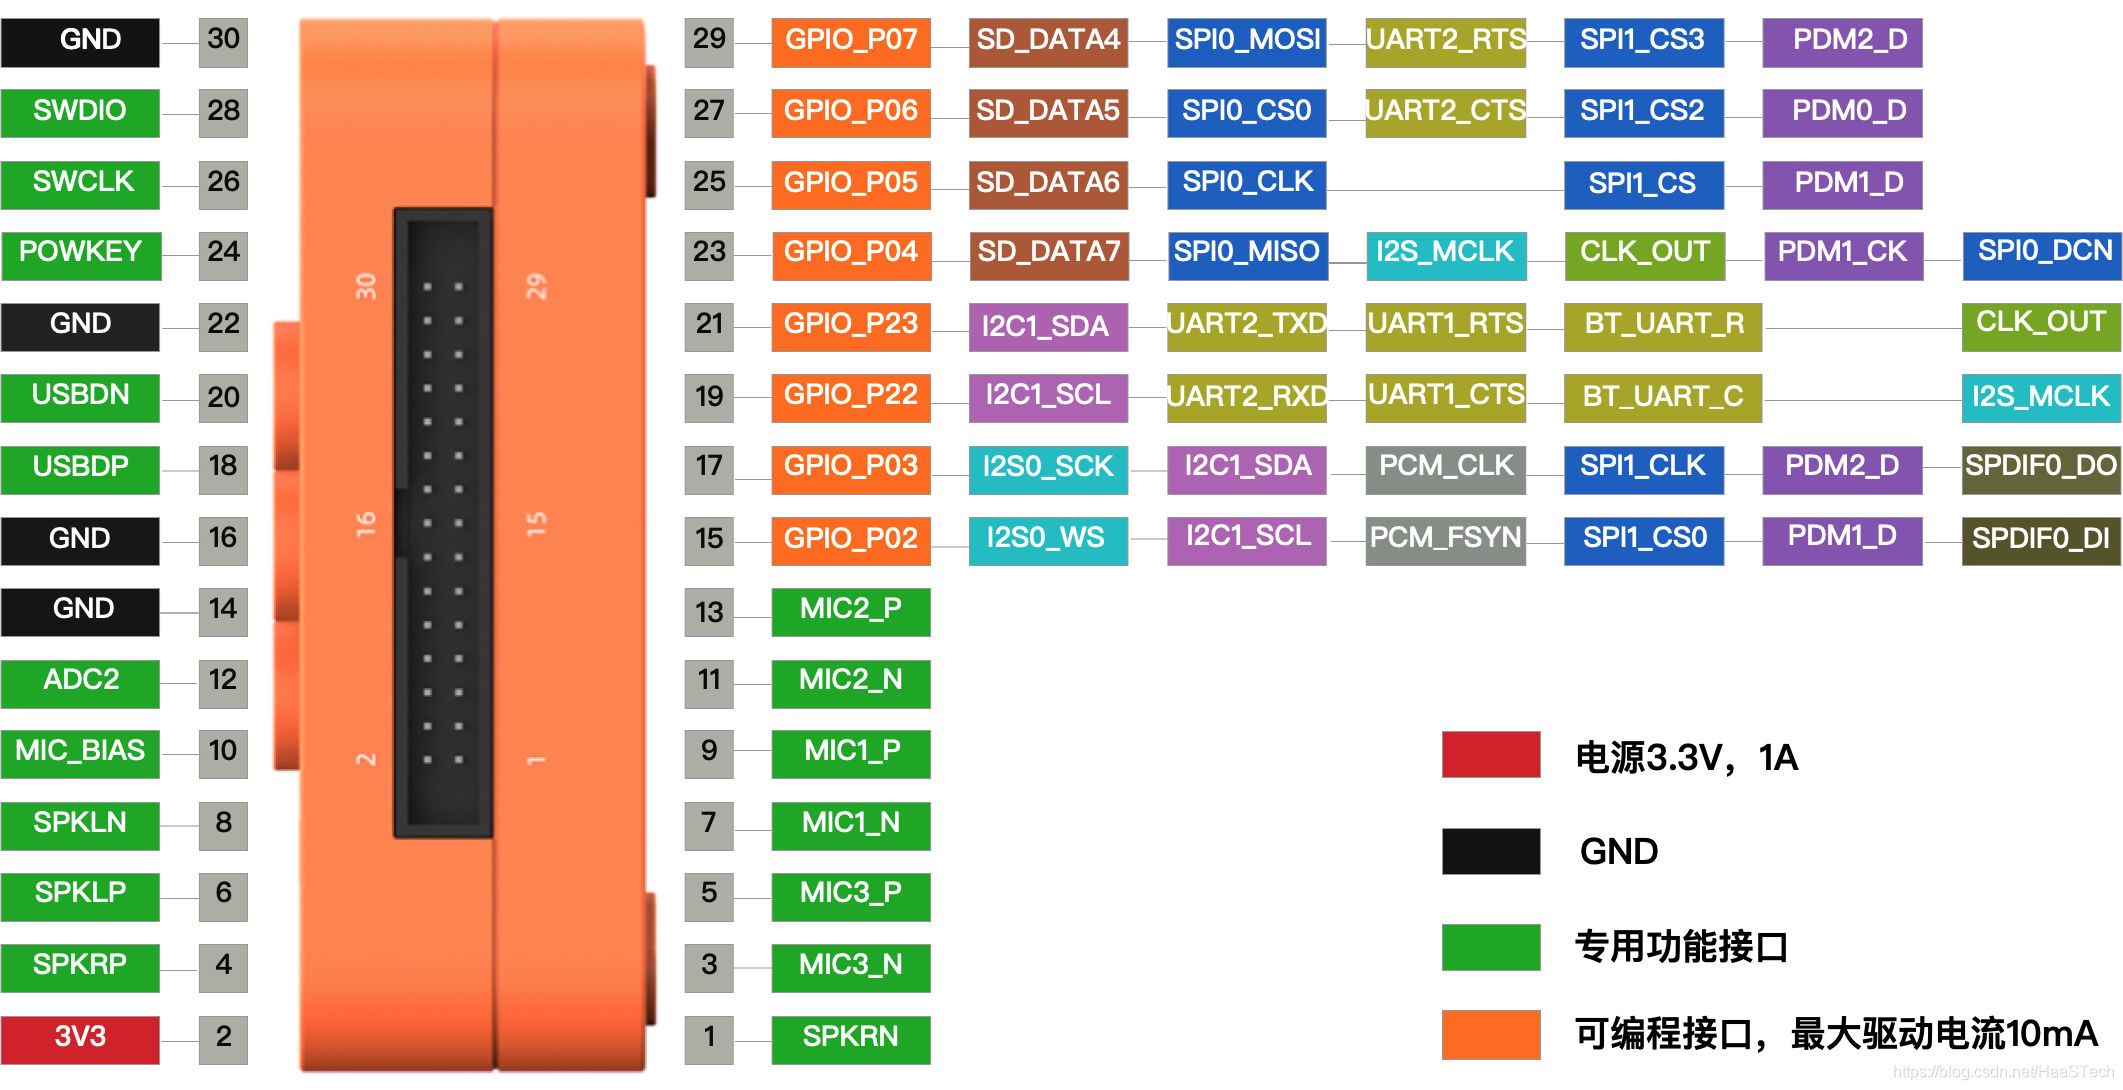
OLED
{
  "oled_spi": {
    "type": "SPI",
    "port": 1,
    "mode": "master",
    "freq": 26000000
  },
  "oled_dc": {
    "type": "GPIO",
    "port": 28,
    "dir": "output",
    "pull": "pullup"
  },
  "oled_res": {
    "type": "GPIO",
    "port": 30,
    "dir": "output",
    "pull": "pullup"
  }
}

from driver import SPI
from driver import GPIO
import sh1106

oled_spi = SPI()
oled_spi.open("oled_spi")

oled_res = GPIO()
oled_res.open("oled_res")

oled_dc = GPIO()
oled_dc.open("oled_dc")

global oled
oled = sh1106.SH1106_SPI(132, 64, oled_spi, oled_dc, oled_res)

oled.fill(0)
oled.text('Line 1', 10, 2, 1)
oled.text('Line 2', 10, 16, 1)
oled.text('Line 3', 2, 24, 1)
oled.show()
SSD1306库部分引用说明
| 函数 | 使用方法 |
|---|---|
| oled = SSD1306_I2C(width, height, i2c, addr) | 构建 OLED 显示屏对象。 width:屏幕宽像素; height: 屏幕高像素; i2c:定义好的 I2C 对象; addr:显示屏设备地址。 |
| oled.text(string,x,y) | 将 string 字符写在指定为位置。 string:字符; x:横坐标; y:纵坐标。 |
| oled.show() | 执行显示 |
| oled.fill(RGB) | 清屏。 RGB: 0 表示黑色, 1 表示白色 |
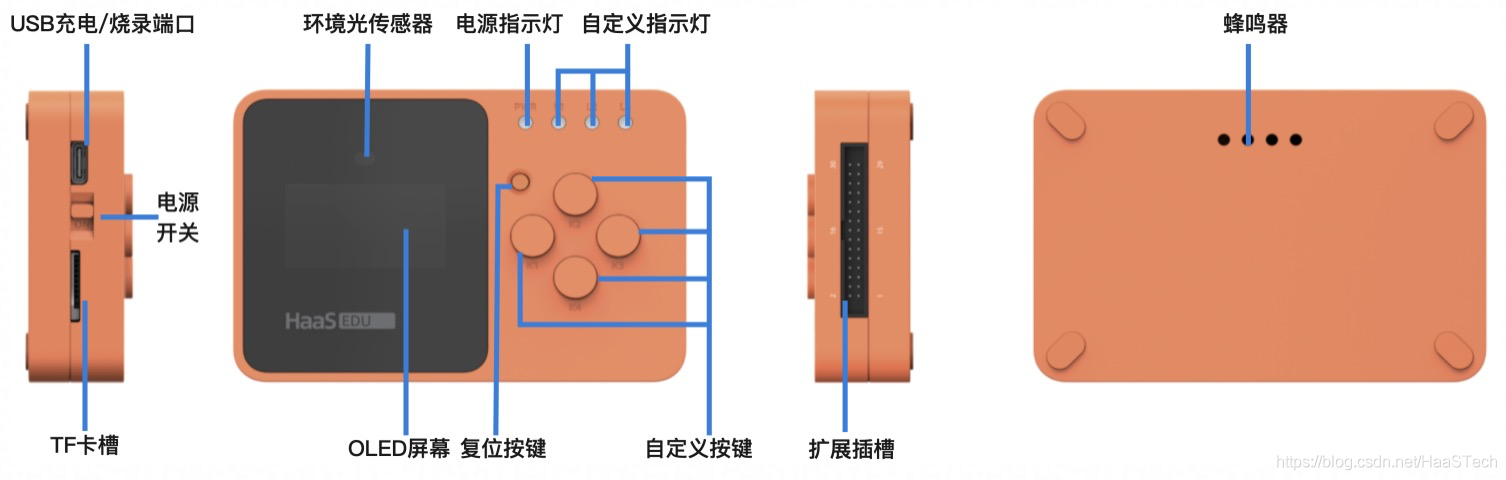
产品图片